
How to fix 'Failed to get IP address' error on Android
Well, if we talk about the list of the best mobile operating systems, without a doubt, it will be on the list of the dominance of Android. Compared to every other mobile operating system, Android offers users a lot more customization options. Despite all its features, Android is still not free from bugs.

Recently, many Android users have reported an unusual error message 'Failed to get IP address or getting IP address'. Android users are getting this error message when trying to connect to a network.
Many Android users claim that they have downloaded some apps that claim to 'fix' the error. However, we do not recommend that you download this type of app because you do not need a third party app to fix this error message.
So, if you also get the error 'Failed to get IP address' error message, you need to follow some of the procedure given below to fix the problem. However, before trying to fix it, let us know why the 'Failed to get IP Address' error occurs.
Why 'Failed to get IP address' error occurs?
OK, 'Failed to get IP address' error message appears while accessing WiFi network. This error message means the router cannot assign an IP address to your device. So, unless your router fails to assign an IP address to the device, you will not be able to access the Internet through the WiFi network.
Now that you know the most likely cause behind the error, it's time to learn how to fix the error. There are several things you can do to fix the 'Failed to get IP address' error message. Below, we've shared some of the best ways to fix IP address errors on Android.
How to fix the (Failed to get an IP address) error?
Below, we're going to share four best ways to fix an IP address error message from your Android. So, let's find out how to fix 'Failed to obtain IP address' on Android.
1. Restart Google Play Services
OK, Google Play Services is a necessary process, and it connects to the countless features and functions on your Android device. So, this is one of the first things to look for when things go wrong. So, this way, we need to restart Google Play Services to fix the 'Failed to get IP address' error message from Android.
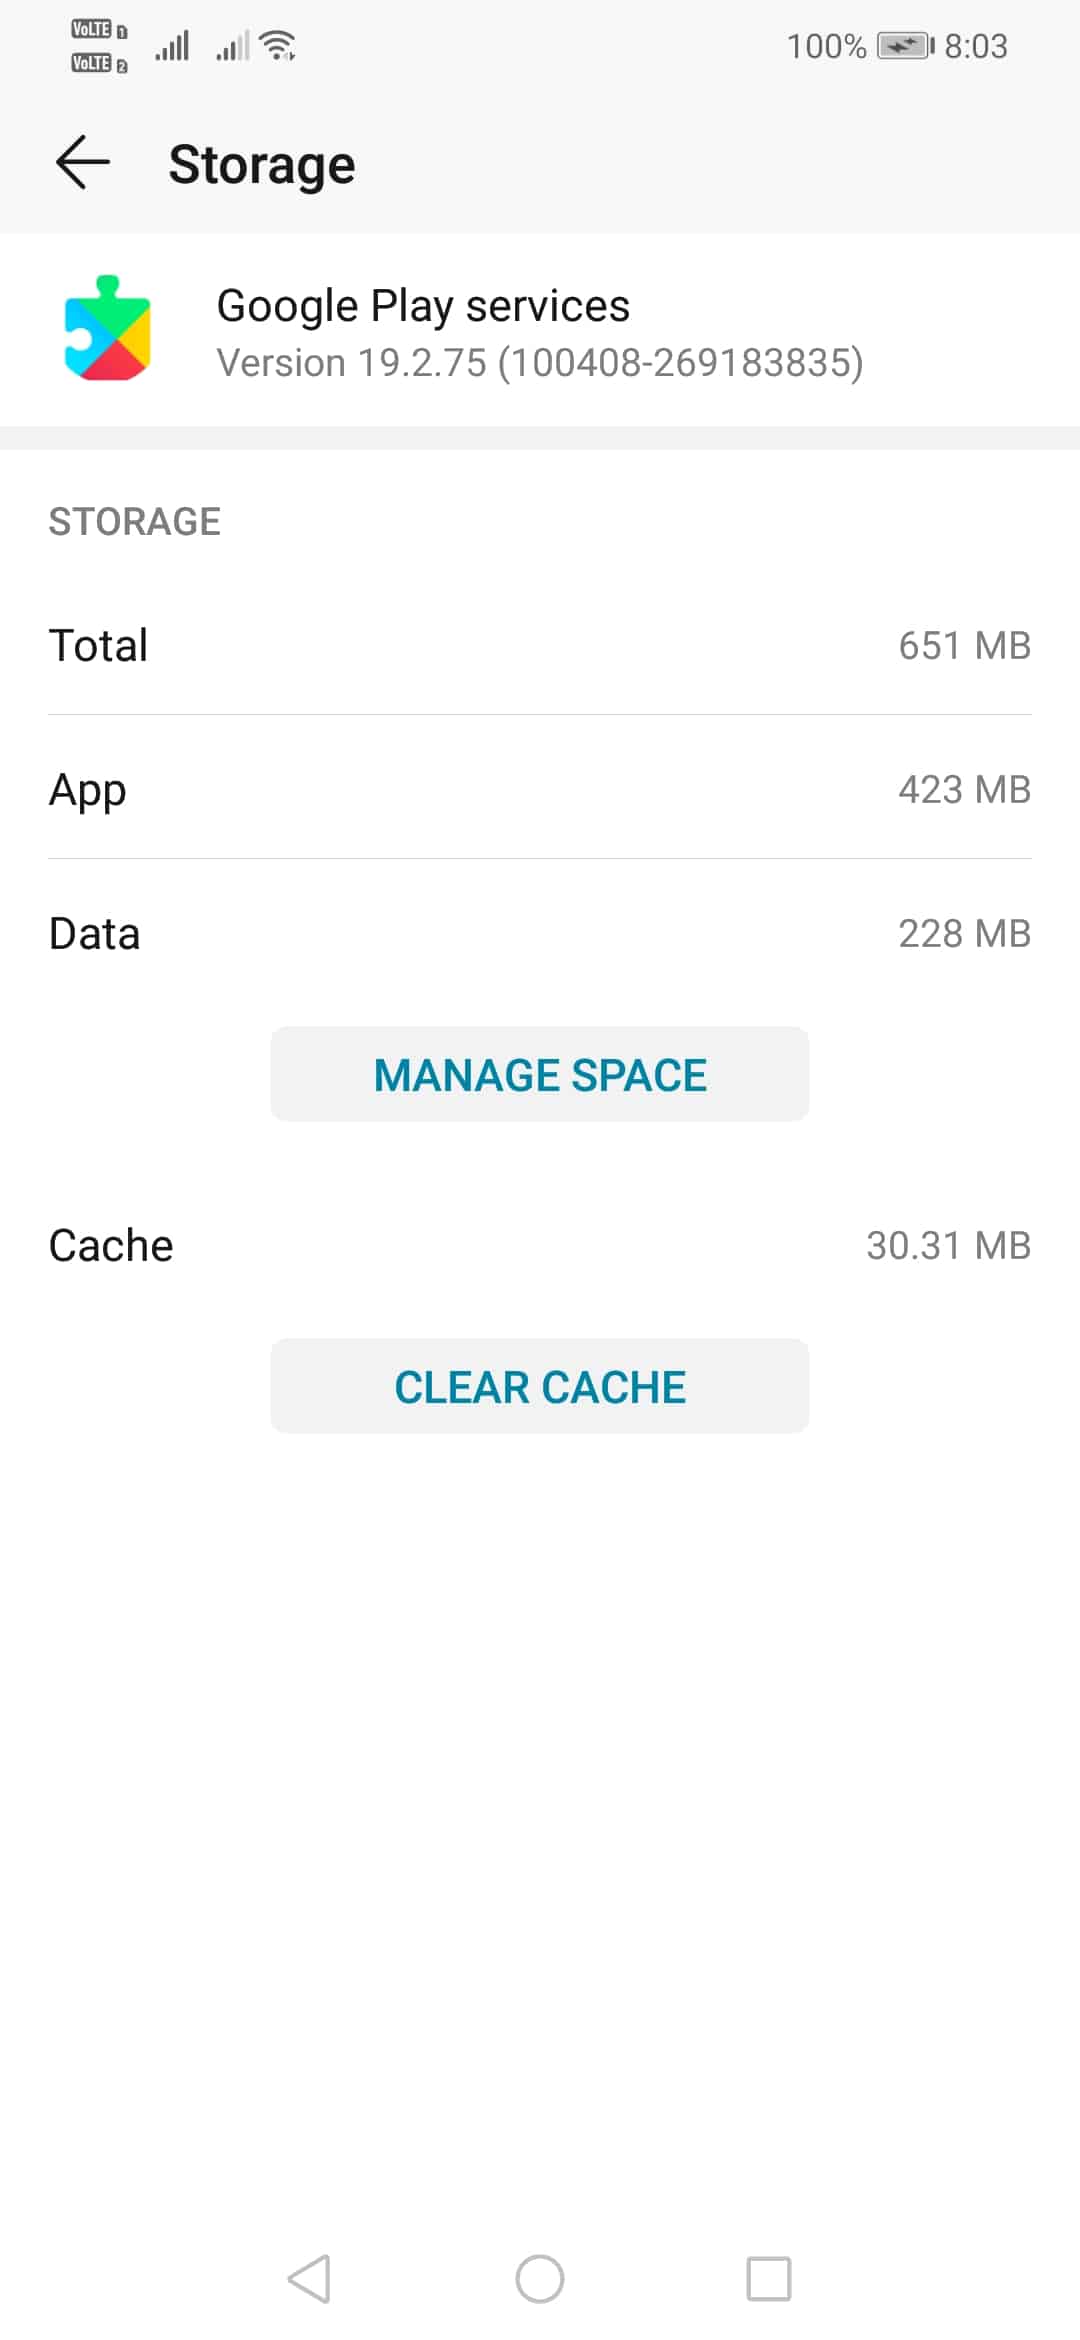
- First, open Settings.
- Now go to apps and notifications
- The then step, find Google Play Services and tap on it.
- Tap 'Force Stop' and then 'Clear Cache'
- Now, connect to WiFi then open Google Play Services again.
If this method fails to fix the IP address error message from Android, follow the next procedure.
2. Forget the network
OK, if you 'fail to get IP address' when connecting to a specific WiFi network, you'll need to follow a few simple steps below.
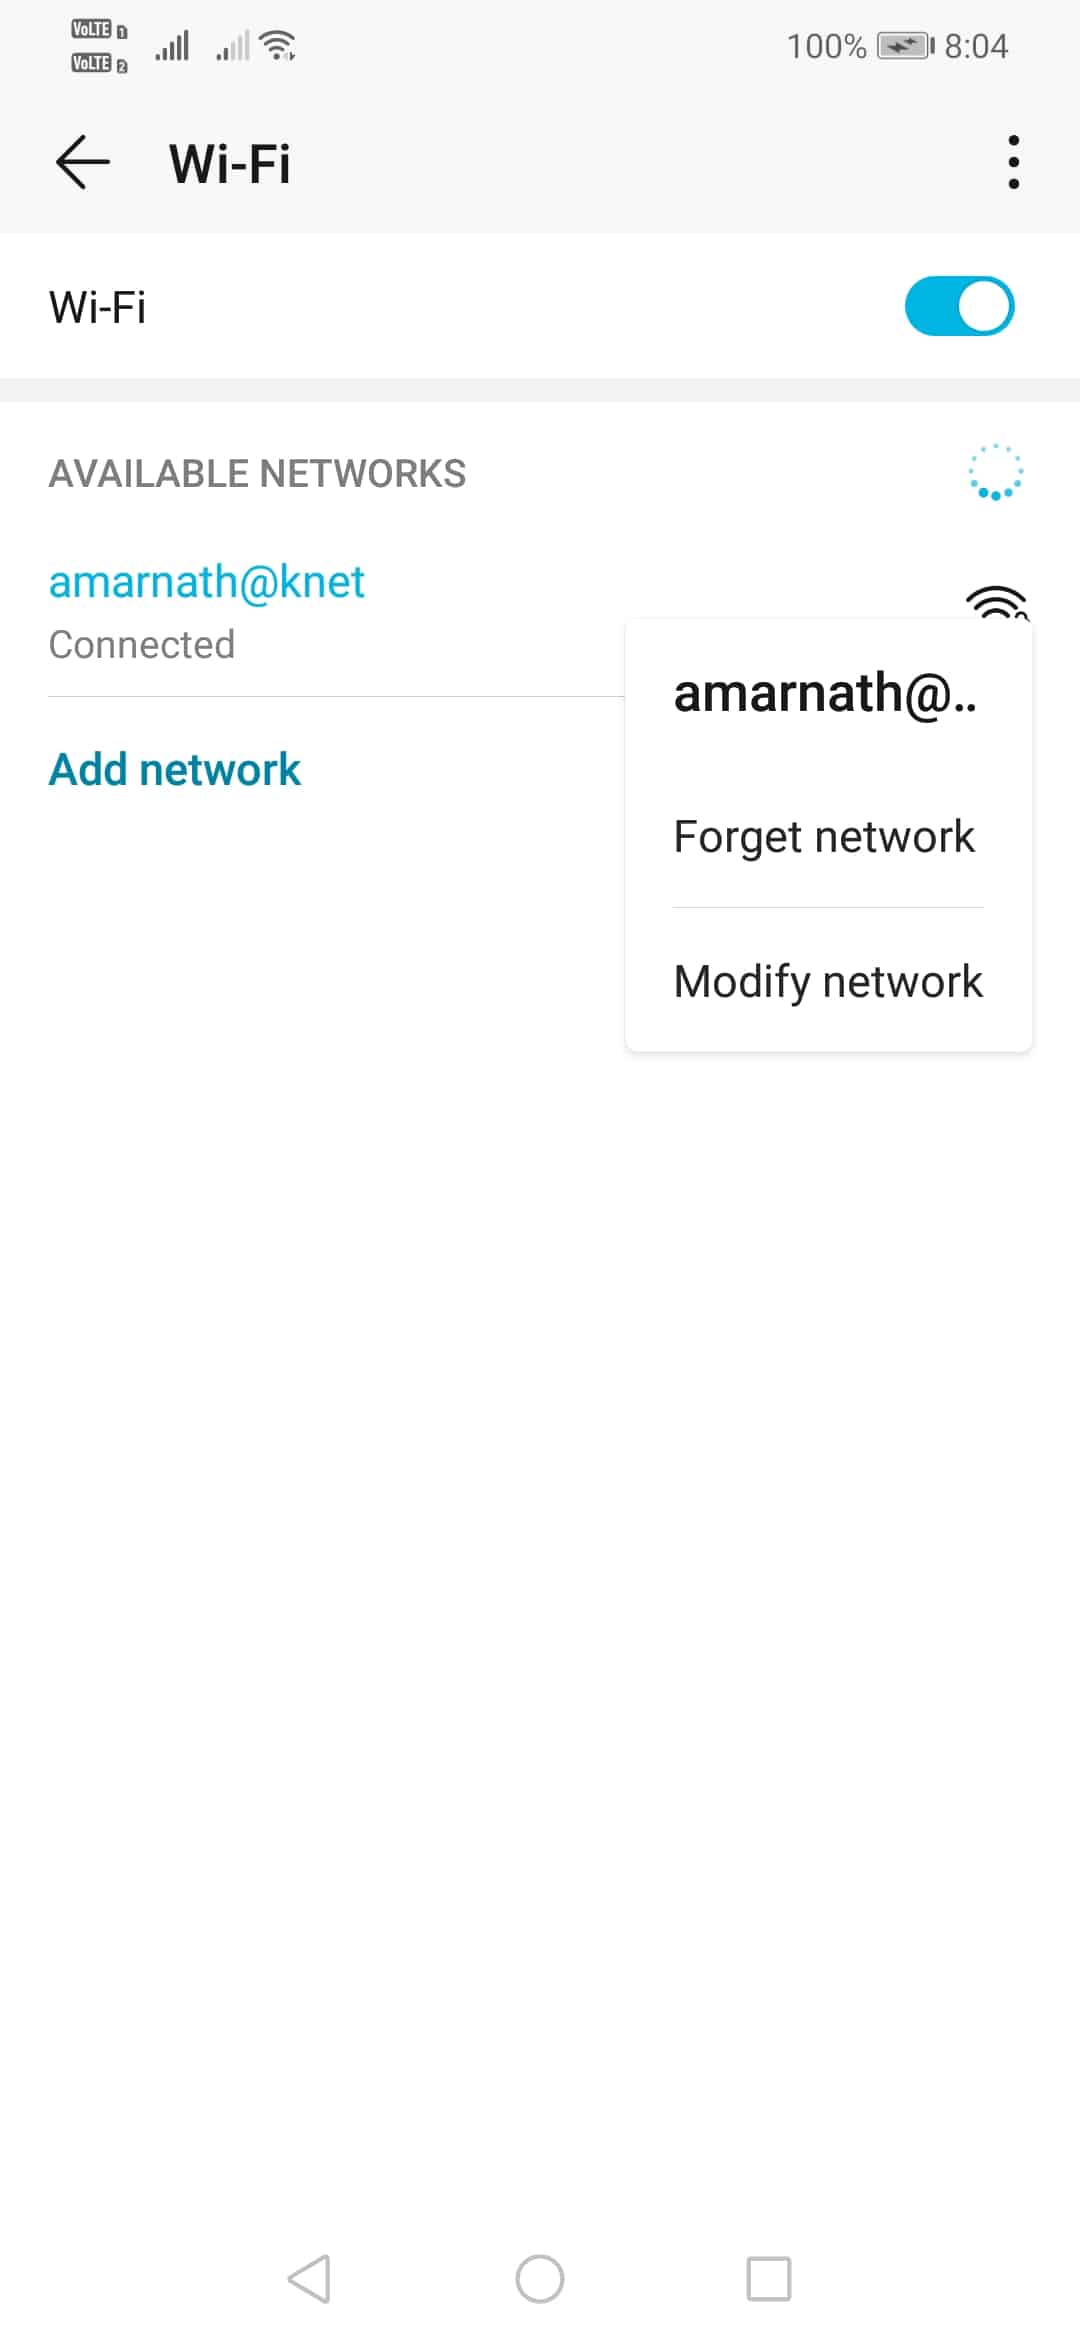
- Open Settings and tap on 'Network and Internet'
- Now, tap on 'WiFi' and then long press on the WiFi network.
- Now select 'Forget Network' from the drop-down list.
- Once done, scan the WiFi again and connect to it.
This will probably fix the 'Failed to get IP address' error message from Android. If you still can't connect to WiFi, follow the next procedure.
3. Assign a static IP address
Since the error message usually occurs when the router fails to assign an IP address to the device, you can choose to assign a static IP address. Follow a few simple steps below to assign a static IP address.
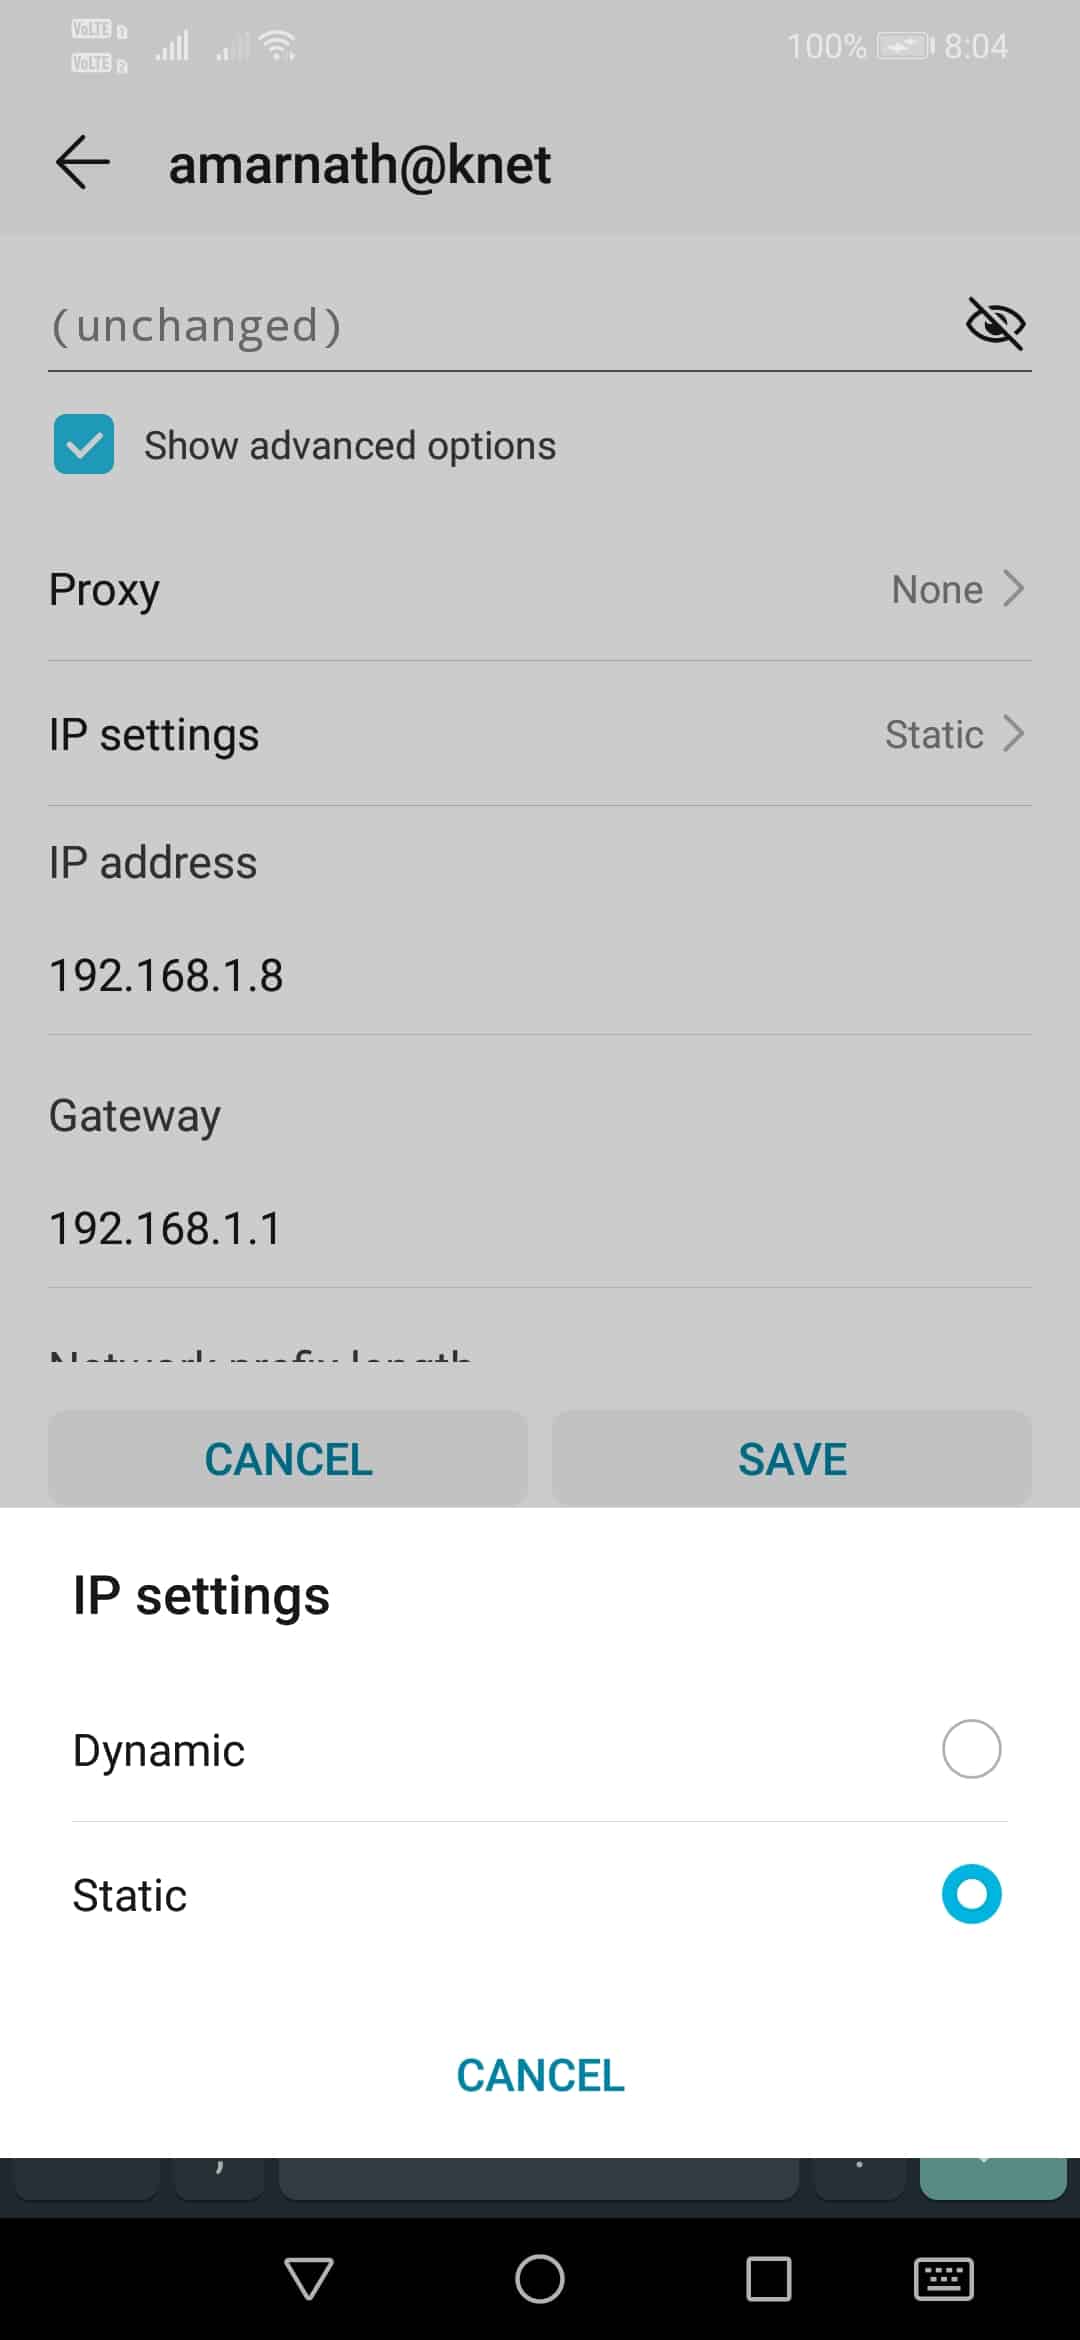
- Open Settings and go to Network> WiFi.
- Long press on the WiFi network and select 'Modify Network'
- Now tap on 'Show advanced options'.
- In the IP settings, select 'Static'
- Now to the IP address, change the last three numbers to any number from one to 225
That's it, you're done! Now try to connect to WiFi network. If all goes well, you'll be able to connect to a WiFi network.
4. Restart the router
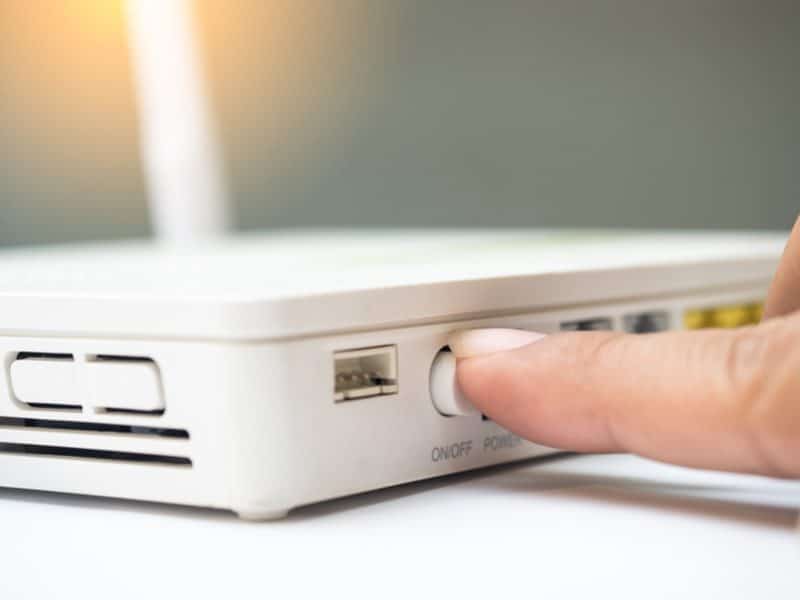
Well, router problems often lead to 'Failed to get IP address' error in Android. So, before following any other procedure, be sure to restart your router. Most routers have a reset button. If your router does not have a reset button, you will need to disconnect it and plug in again.
5. Rename your Android device
Many Android users have reported that they have failed to get the IP address error on their device by changing the name of their Android device. We're not sure why this will help, but you can try your luck here. Changing the name of an Android device is easy, follow a few simple steps below.
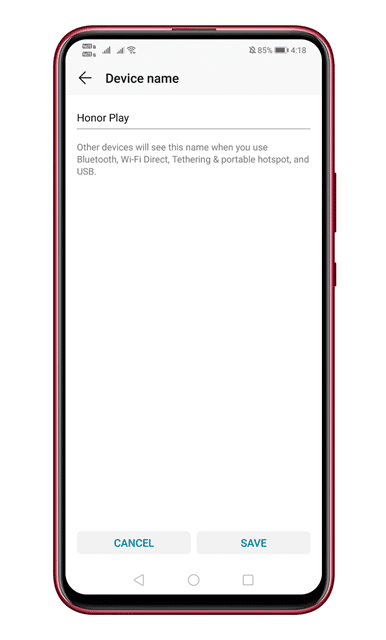
- First, open Settings > About Phone
- Tap on 'Device Name'
- You need to change the device name and select 'Save'
- Now done, restart your Android and connect to the router.
6. Factory data reset
Well, if all else fails, the last remaining option is a factory data reset. However, it will delete everything stored in your internal storage and return to its factory state. So, make sure to create a proper backup before factory resetting your smartphone. Follow the few simple steps given below to factory data reset your Android.
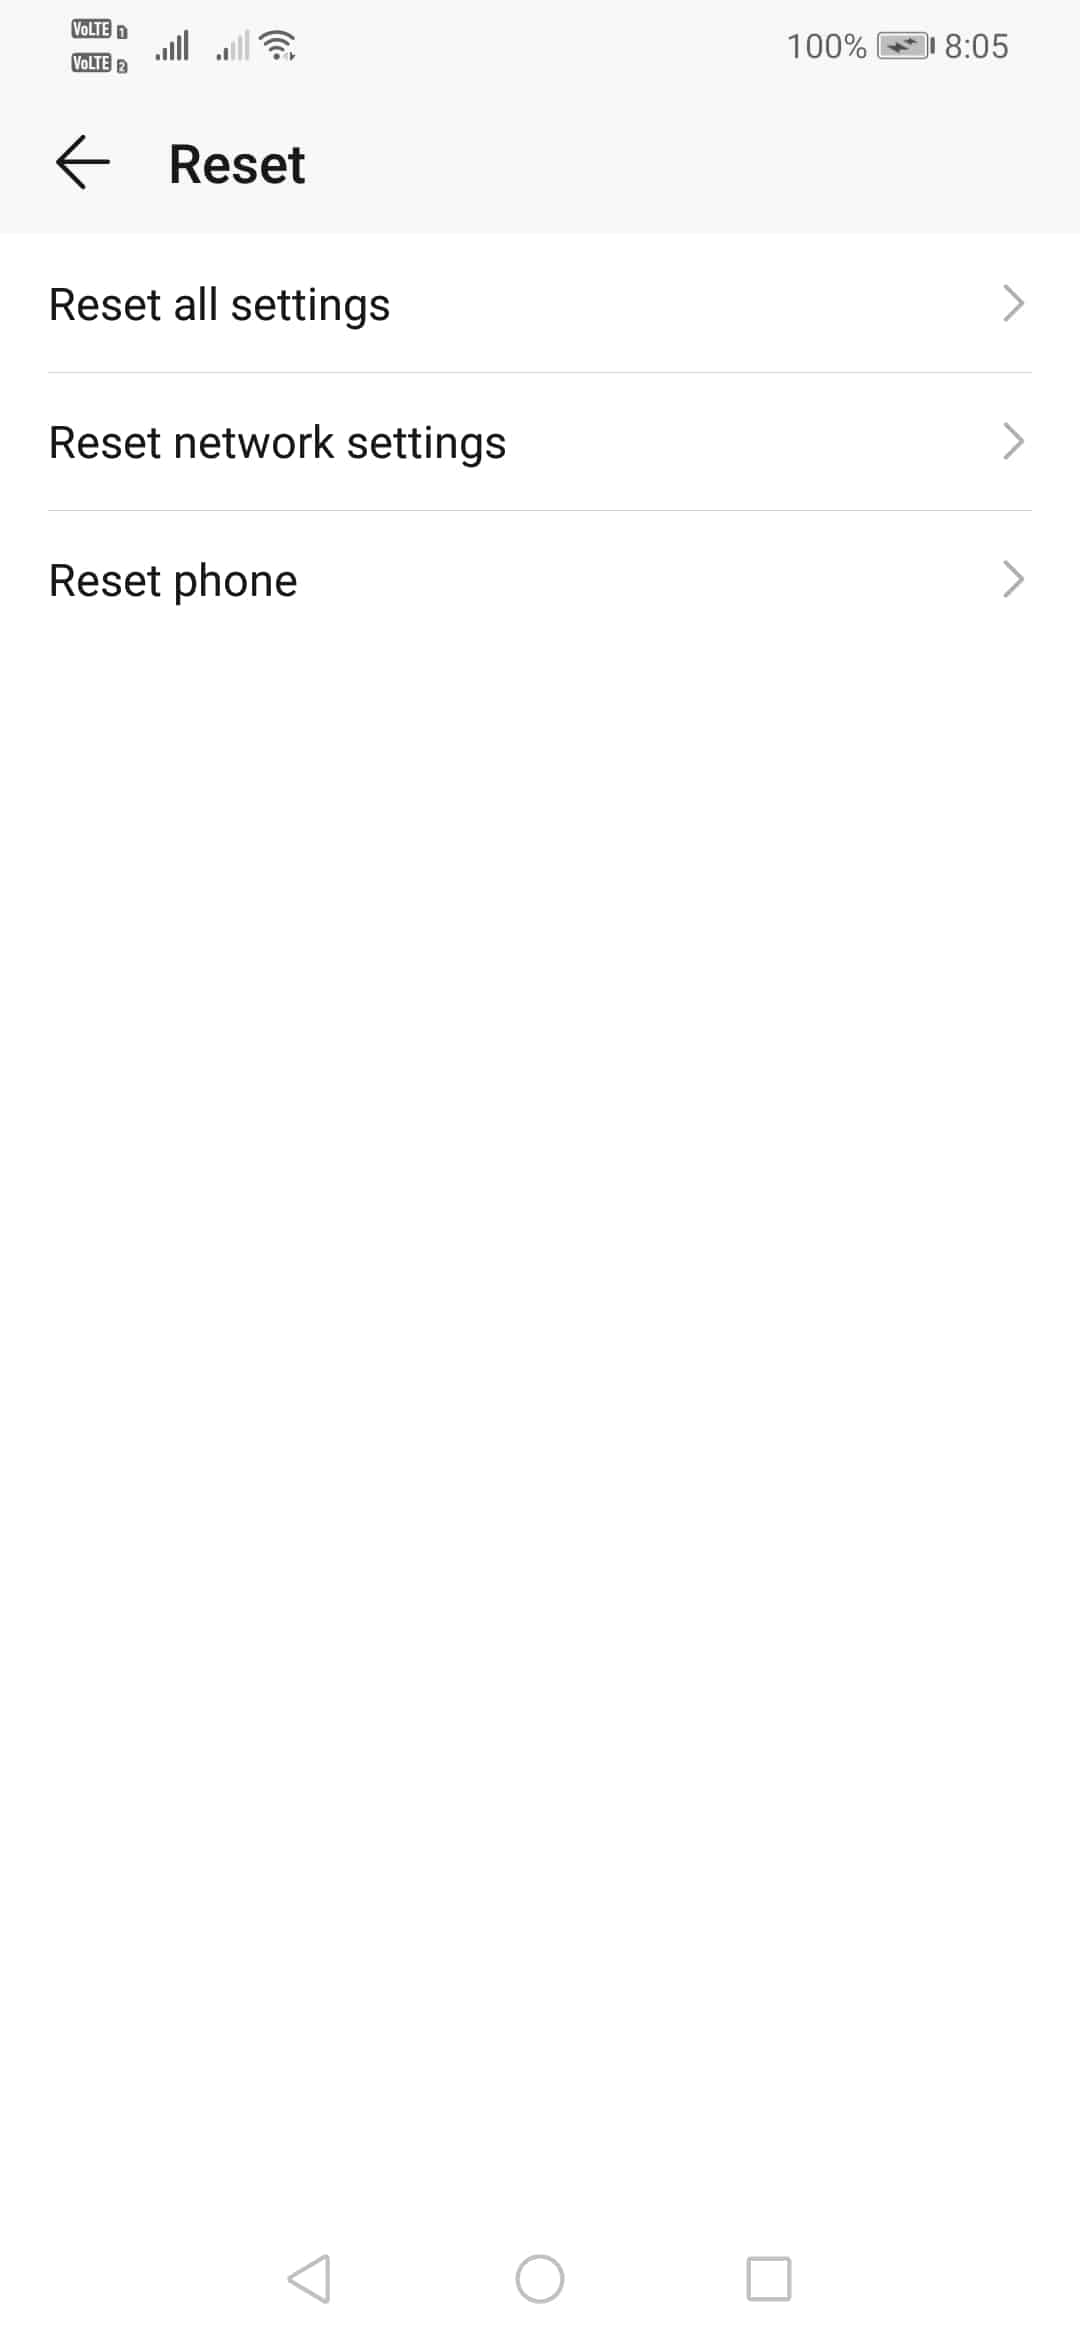
- Go to Settings > System > Advanced options.
- Now find the 'Reset' option
- In the next step, tap on 'Wipe All Data' or 'Factory Reset'
- Finally, tap on 'Reset Phone'
Now, wait for a few seconds until the factory data reset completes. Once done, then connect to the WiFi network again.
So, these are the four best methods to fix 'Failed to get IP address' error message on Android. If you know any other method to fix the error then let us know in the comment box below.