
How to Change the Default Font in Microsoft Word
Microsoft Word is the most popular word processor, which comes bundled with the Microsoft Office suite. One of the reasons behind the huge popularity of the software is the plethora of features and functionality it offers.

With the launch of Microsoft Office 2017, the company changed the default font from Times New Roman to Calibri. Since then, Calibri has continued to be the default font in the Microsoft Office suite until now.
In this guide, we will show you how you can easily change from Microsoft Word's default Front Caliber to a font of your choice.

Change the default font in Microsoft Word
Now before proceeding further, make sure that you have already installed your favorite font on your computer. You can test ahead by opening the font folder with the Run command. Press the Windows + R key on your keyboard and in the Run window, type the words "Fonts" and click Enter.
You will now be able to check the installed fonts from that folder.
Step 1: Open any Word document on your computer. Alternatively, you can open Microsoft Word from the Start menu.
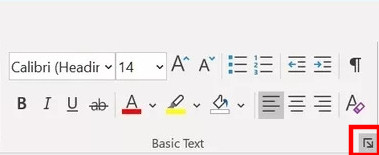
Step 2: Now, in the Basic Text section, tap on the small arrow in the lower corner. This will open the Advanced Format bar.
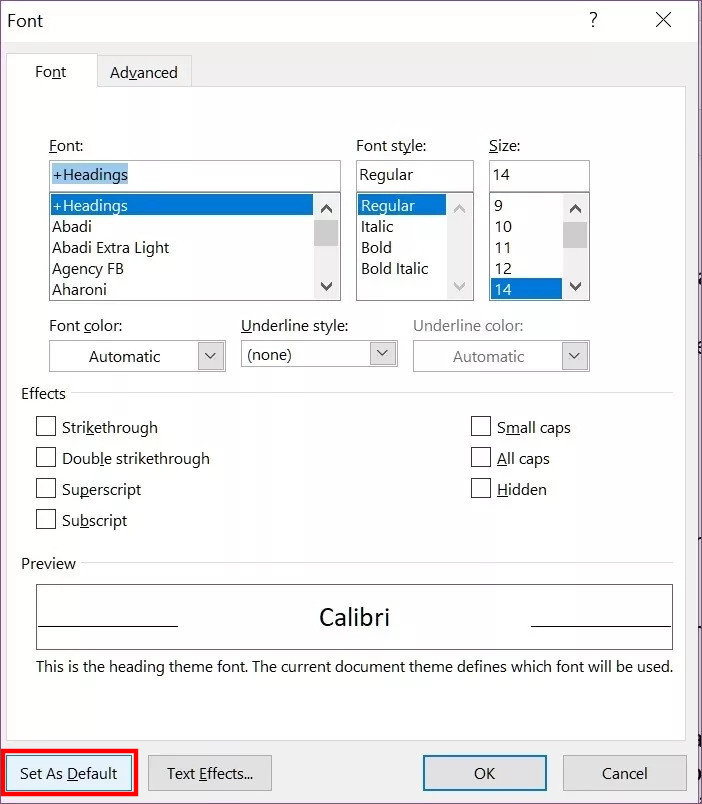
Step 3: From the given options, select the new font as well as the font size as per your preference. Once that's done, hit "Set as Default" and you're done.
From now on, whenever you open the Microsoft Word application, your selected font and font size will be the default settings.